
The other night, I was ripping out the
seams on my very well-loved t-shirt so I could use the pieces as a pattern to make
more shirts like it (this t-shirt is at least 4 years old and becoming so
threadbare that I really shouldn’t wear it anymore, but it fits so nicely on my
body. I have looked for it in stores, but it was probably discontinued years
ago). I was lounging in front of the tv, and each time that I wanted to throw
out a torn out thread, I would have to sit up to get the to the garbage can.
Being the lazy person that I am, I decided to make a little pail that can sit
beside me on the couch, so that I no longer have to do a sham sit-up each time
I want to toss a piece of thread. This can also be used on your sewing table or
in your cutting table.


Fuse the interfacing on to the wrong side
of your fabric pieces.

Then, place the craft weight interfacing between your fabric pieces, wrong sides of the fabric against the interfacing. If desired, bast stitch very close to the edge to join the layers together, though this is not necessary, it just makes it easier to pin the sides.

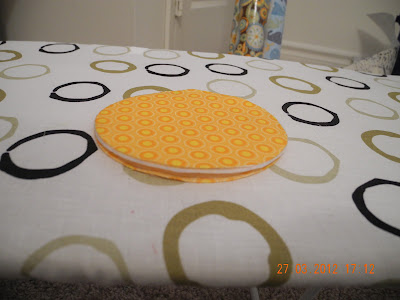

Then, place the craft weight interfacing between your fabric pieces, wrong sides of the fabric against the interfacing. If desired, bast stitch very close to the edge to join the layers together, though this is not necessary, it just makes it easier to pin the sides.


For the walls of the catcher, first
determine the circumference of your circle.
Diameter
x π (pi, 3.14159265) = Circumference
4.5”
x 3.14159265 = 14.13”
Alternately, you can also measure the
circumference by wrapping a measuring tape along the outside of your circle.
Next, determine the finished height of your
catcher. You may use any height you desire. I choose to make a final height of
5.25”, so that I can fold over some of the top (I personally like how it
looks). Cut out 1 piece of fabric and 1 piece of fusible interfacing that
measures 15.13” (circumference + two ½” seam allowances) by 11.5” (two x height
+ two ½” seam allowances).


Fuse the interfacing to the wrong side of
the fabric rectangle.

Stitch the edges of the two sides that will be sewn together to make the circumference, to prevent the edges from fraying. You can use a wide zig-zag stitch, an overlay stitch or you can use a serger, which ever you are more comfortable with. I used an overlay stitch, because the overlay foot keeps the fabric from bunching together.

Now, fold the fabric in half, right sides together, with the stitched edges together. Sew the edges together with a ½” seam allowance.

Open up the fabric along the seam and press
the edges down flat, like so:


Fold the fabric tube in half, wrong sides
together and press the fold.


Using a ½” seam allowance, sew along the
fold at the top all the way around.


Using your seam ripper, rip open the seam
that joins the tube together above your last seam.


This is where you can put a string or
ribbon in order to close the bag. To add the string or ribbon, pin a safety pin
to one end of the ribbon and feed it through one side.
Push the pin through and bunch up the
fabric onto the pin. Holding the pin head, pull the gathered fabric over the
ribbon. Continue until the ribbon comes out the other side.
If you want to make a ribbon to match your
bag, make bias tape (HERE) and sew the two edges together.
Now, pin your bottom circle to the tube.
Begin by pinning it into quadrants, then begin to add pins into each quadrant,
to make sure that the fabric doesn’t stretch to much (similar pinning technique
used HERE).


Sew the bottom to the top, using a ½” seam
allowance. Trim the excess. Reinforce the bottom seam with a wide zig-zag, an
overlay stitch or by using a serger.


Now, this can be the end of your bag, just
turn the bag inside out. You now have a scrap catcher.


No comments:
Post a Comment